Followers

Showing posts with label Sassy Studios Designs. Show all posts

Monday, 1 December 2014

'Do You Wanna Build A Snowman?' for SSD


Hiya today see's the start of a New Progressive Challenge over on the Sassy Studio Designs Facebook Group and the Image for this Challenge is the oh so cute 'Snowman and Sentiment' Inspired  by the Film - Frozen 

You get the 'Snowman & Sentiment' Free by request for joining in the Challenge you can can chose to use either or both but if you request them you need to enter or no Freebie Next Month - head over to the Facebook Group to see some Design Team inspiration and to see all rules for entering 

This is my Last Design Team Project for Sassy Studio Designs - I have stepped down for personal reasons - but such a lovely project to end on x 

Here is my make using the Cute Image

I coloured him using Copic Markers


Snow: C3, C1
Mouth, Coals & Eyebrows: C7, C5
Nose: YR07, YR04, YR02


I have teamed my coloured Image with a pretty Snowflake backing paper printed from one of my Crafters Companion CDroms 'Bebunni Christmas'

Recipe
I used a 7x7 Cardblank
Holographic mirror board trimmed to fit a few mm smaller than the Cardblank
Snowflake Backing Paper trimmed to fit a few mm smaller than the backing paper
Topper Image trimmed to a few mm of the coloured Image backed with Holpgraphic mirror board
Topper attached using foam tape at a jaunty angle
Snowflake Circle die cut from Holographic mirror board cut into 2 parts attached around the topper
Sentiment trimmed and backed with Holograhic mirror board attached with thicker foam tape attached at a jaunty angle the opposite way to the topper
Snowflake dies various sizes cut from Holographic mirror board attached using tacky glue in various places around the card to balance it
Gems attached with glossy accents to a few Snowflakes and in corners of the card

I hope you like my card and will visit my Blog again soon

Go on over to take part in the Sassy Challenge in the Facebook group it is a lot of fun

Hugs
Kerrie xx
Sassy DT (last time)


Thursday, 27 November 2014

I would Thank You from the Bottom of my Heart....


Today there is a New Dare To Be Sassy Thursday (DTBST) Challenge over on the Sassy Studio Designs BLOG and the theme is 'Giving Thanks'

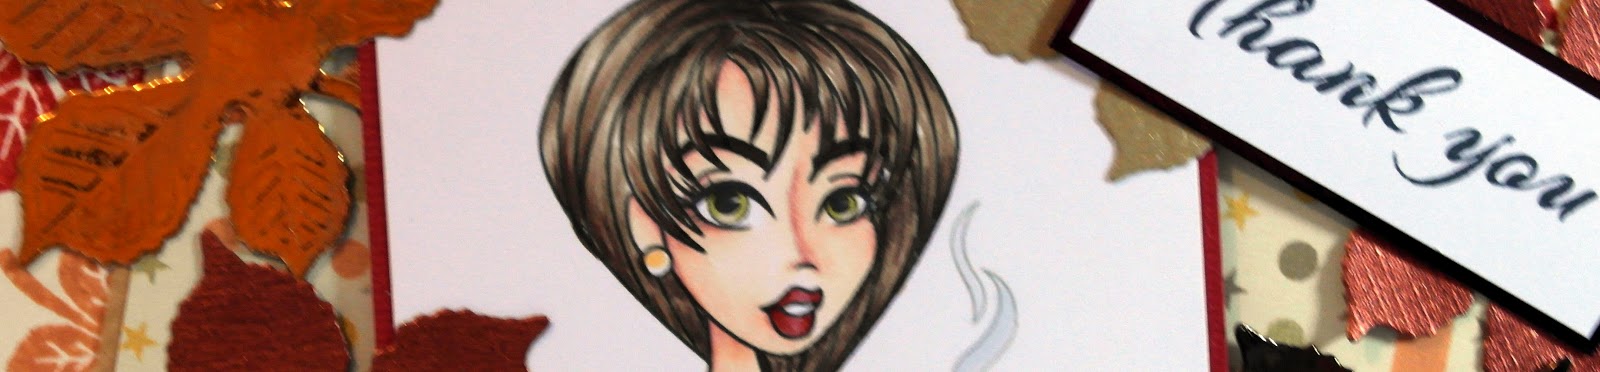
I chose to use one of the New Images from the Sassy Studio Design's Store 'Princess Feathers Portrait' she was really fun to colour


I coloured her using Copic Markers

Hair: C9, C7, C5
Skin: E44, E43, E41
Eyes: E44
Lips, Feathers & Headband: R24, R22, R20


Recipe

A5 cardblank made with Centura Pearl cardstock.
Studio Light Backing Paper backed with dark brown Mirror Board.
Hessian Strip with strip of dark brown Mirror Board for dimension.
Oval die (Joycrafts) that cuts a border and an inner, cut the border from Mirror Board and the topper from super smooth cardstock that I had printed the Image onto.
Leaves and Mushroom dies (Joycrafts) cut from Mirror Board and Kraftcard, layered up.
Sentiment from 'Scrap-a-licious Times' trimmed and backed with mirror board, fixed at a jaunty angle.

I hope you like my card and will visit the Sassy BLOG to see the other makes from the Design Team and enter the Challenge go on its a lot of fun.

Thank you for visit my Blog I hope you will visit again soon

Hugs Kerrie xx
Sassy DT

Saturday, 22 November 2014

Portraits - New Release Blog Hop - Sassy Studio Designs

Hiya and welcome to my Blog

Today is a very exciting day for Sassy Studio Designs as the Design Team get to share with you their makes using the New Sassy Portrait Images 

You should have arrived here from Sassy Studio Designs Blog if you have just found your way here from elsewhere please start at the beginning you you dont get lost along the way 

I have been making with 'Scarecrow Portrait'


I coloured her using Copic Markers


I chose papers to colour match my colouring and some brown mirror baord for Matt & Layering behind the image. I fussy cut the image and attached to the front of the card using glue gel. I diecut some leaf stems to tuck behind some paperflowers, some are printed and fussy cut and some are from wild orchid crafts.

The sentiment I printed using my laptop, I was inspired by the 'Scarecrow' song from the Wizard of Oz to make this card and I was singing 'If I only had a Brain' the whole time i was making it.

I hope you like my project and are enjoying the hop today

Hugs Kerrie x x
Sassy DT

Your next stop along the Hop is the Brilliant Karal's BLOG 

Friday, 21 November 2014

Sassy Sneak Peeks of the New Release Tomorrow

Hiya and welcome to my Blog

Today I am sharing some Sneaky Peeks from tomorrow's New Release Images

We will also be having a Blog Hop to Celebrate starting at the Sassy Studio Designs Blog and following through all the DT Blogs to see their creations using the New Images which will then be available in the store

So here are the sneaky peeks of the New Portrait Images...


Don't they look so so pretty we are very excited to show you these images tomorrow on our Projects I really do hope you will join us for the Hop

Krafty Hugs
Kerrie x x
Sassy DT

Thursday, 20 November 2014

Tealight Gift Box - for DTBST


Hiya and Welcome to My Blog

Today its a 'Dare To Be Sassy Thursday' so its time to show you my make for the New Challenge over on the 'Sassy Studio Designs BLOG' the theme today is 'Watch it Fall - Leaves'

I chose to use 'Effie Trinket 1' for my Image today as she is also up as our 'Flashback Friday' Image for tomorrow so keep your eyes open for when she is available at the Special Flashback Price for the week starting tomorrow 


I coloured her using Copic Markers

I wanted to make something a little different so I created a box for some tealight candles using pearlescent cardstock and cut out a window which i lined with acetate


I printed out a quote from 'Emily Bronte' about Fall Leaves, matted this onto sanded kraftcard and fixed to the card front.

I die cut some leaves from mirror board and textured metallic paper and attached them around the window.

I then fussy cut 'Effie' using a pair of small scissors and fixed her to the front of the box.

Its a simple make but really nice to give to someone as a gift

I hope you like my make and will visit again soon, dont forget to head on over to the Sassy Blog to see the Design Team examples and enter the challenge

Hugs Kerrie x x
Sassy DT

Thursday, 13 November 2014

Its Beginning To Look Like Fall - DTBST - Sassy


Hiya it's Thursday again which means the start of a New 'Dare To Be Sassy Thursday' Challenge over at the Sassy Studio Designs BLOG 

The theme this week is 'It's Beginning To Look Like Fall'

The Sassy Team would like to see your projects made using the colours of 'Fall'

That means 'Yellow, Orange, Red, Gold'

You dont have to use a Sassy Studio Designs Image to enter but if you do you get to enter twice

Here is my Project for today's Challenge I have used 'Holiday Pie Sassy' as my Image


This Image is also part of our Flash Back Friday post this week, she will be available at a discount price in Store for one week so go over and grab her quick as she will go back to full price next Friday.

I have coloured her using Copic Markers

Hair: E49, E44, E43
Skin: E04, E11, E21, E00, E000
Eyes: YG95, YG91
Lips: E09, E07, E04
Pearls: YR000, YR21
Belt & Shoes: E49, E44, C3
Dress: R08, YR07, YR04, YR02
Pie Tray & Steam: C3, C1
Pie Crust: E35, E31, E44


I made my own backing paper using a piece of ivory cardstock, distress inks and a lovely leaf stamp from Paperbabe Stamps.

I used some matt & layering using a printed backing paper from a Serif Thanksgiving Digi Kit, some offcuts of cardstocks from my stash and dark brown mirror board.

I used a leaf die from Joycrafts for all my embellishments. For a little extra touch I printed a Thanksgiving Menu and tucked this behind the topper.

The sentiment stamp is also from Paperbabe stamps.

I hope you like my card and will visit again soon

Please do visit the Sassy Studio Designs BLOG to see the other Design Team projects and to enter the challenge.

Hugs Kerrie xx
Sassy DT

Thursday, 6 November 2014

Frankie - DTBST - Sketch It Up


Hiya today we have a New Challenge over at Sassy Studio Designs blog for DTBST (Dare To Be Sassy Thursday)

The theme today is a Sketch


I've had an Image and Papers from Sassy Studio Design's printed out for a while now so decided now was the time to get her coloured up and on to a card

I used the 'Monster Sassy Frankie Set' - digi image and papers


 I coloured her using Copic Markers

Skin: BG11, BG10
Eyes & accessories: B02, B00
Lips: E07, E04
Eyeshadow: V20, V01
Bow: V01
Dress: C9, C7, C5
Belt: C5 and silver sakura
Tie: C6, C4
Stitches: C3
Skirt: C2, C0
Shoes & Hair: C8, C6, C1, 0


I made a Paper Rose using spotty paper from my scrap box and a Blossom Punch by Joycrafts, I shaped the petals using the Blossom Tool Kit also by Joycrafts


I used an A4 embossing folder designed by Sue Wilson for the background I matted this panel with black cardstock and fixed to an 8x8 cardblank. The Argoyle Papers are from the 'Monster Sassy Frankie Set' this i trimmed into a strip, matted using silver mirror board and fixed to card front using foam tape. The tabs I cut from scraps from my scrap box and attached under the Argoyle panel using glue gel.

I trimmed the Image into a topper, matted with black cardstock and attached to the card front using 2 depths of foam tape because one side fits to the already raised panel. I then trimmed a patterned ribbon from American crafts and fixed to the cardfront using tacky glue so that it tucked just under the image topper.

I die cut some flowers and layered up with centres and fixed to the card front using glue gel, I attached the large paper rose to finish my card. I have not added a sentiment yet so i can re-use this card in future for any birthday party etc that one of my girls may get invited to.

I hope you like my card and that you may be inspired to try something new with the sketch from the DTBST Challenge please do visit the blog to see all the details

Krafty Hugs
Kerrie x x
Sassy DT


Thursday, 30 October 2014

Patchwork Pretties - Challenge entry for Creative Knockouts


Today Sassy Studio Designs are sponsoring a Challenge over at Creative Knockouts the challenge theme is 'Patchwork Pretties' so which Sassy Image did I chose? Sally Honey of course for her beautiful Patchwork Dress. I love her she is so spooky but in this card I have softened her with some pretty pastels to show that she isnt just for Halloween. I teamed he up with a lovely sentiment stamp from Visible Image about Friends being a Patchwork - such a lovely sentiment.


I coloured her to match my papers using Copic Markers

Hair: C8, C6, C4
Skin: E04, E11, E21, E00, E000
Eyes & Socks: B24, B21
Eyeshadow: YG63
Lips: R24, R22, R20
Shoes: C6, C4
Dress: YR04, YR02, R22, R20, YR000, B24, B21, C1, YG63, YG61


The papers I used were offcuts from my stash which I pieced together to form a patchwork background. I used a Halloween foam stamp set for the webs and spider, I used a quilted embossing folder for the layer behind the topper and I have used some silver mirror board for the matting. I used a piece of ric-rac ribbon and a silver spider charm in the top corner of the card. I added some dimension and texture with 2 circular die-cuts cut from pearlescent cardstock. A few gems from my stash finished the card nicely.

I hope you like my card and will check out the Challenge over at Creative Knockouts.

Dont forget to join the Sassy Studio Designs Facebook Group to join in all the Sassy Fun.

Krafty Hugs Kerrie xx
Sassy DT

I am entering this card into the Challenges below

creativeknockouts.blogspot.ca - Pretty Patchwork

Tuesday, 28 October 2014

Sassy Effie - for Pearls&Lace and Sketch Challenge


This post is for a Challenge that Sassy Studio Design's are sponsoring

The Challenge is from 'Digi Sketch Challenge' please follow the link below


The Challenge Theme is 'Sketch/Lace & Pearls' you can chose to follow the theme or the sketch or challenge yourself by following both.

For my Sassy Studio Design's DT entry I have used both as I love a Challenge

The Sassy Studio Design's Image I chose to use is...

Effie Trinket 2(scroll down to find Effie)


I coloured her using Copic Markers

Hair: E44, E43, E41
Skin: E04, E11, E21, E00, E000, R02
Dress & Flower: R22, R20
Skirt, Gloves & Shoes: YG67, YG63, YG61
Belt: E44, C6


I have used Digital Papers from my stash with layers of Pink Mirror Board.

I rounded the corners of my 8x8 card blank, backing paper and mirror board.

I have used pale pink organza ribbon and crochet lace for the 2 borders from the sketch I followed.

The square die i used is from Tonic, I fussy cut the Image out and fixed to the die cut panel to form the square in the centre of the sketch.

I used a circle sentiment stamp and some circular dies to make one of the circles to the side of  the sketch, with a big fabric flower and pearl for the other circle from the sketch.

By using crochet lace and a large pearl I have followed the Pearls & Lace theme as well.

I hope you like my card and will visit again soon

Dont forget to join in the Challenge for a chance to win some Digi Images from Sassy Studio Design's and stop by and join the Sassy Studio Design's facebook group to join in some more fun Challenges and keep up to date with everything new

Krafty Hugs Kerrie xx
Sassy DT


Wednesday, 22 October 2014

Sassy Witch for Sponsor's

Hiya over at Sassy Studio Designs we like to Sponsor Challenge Blogs

Today we are Sponsoring Penny's Challenges their theme is Polka Dots & Pearls

We are also Sponsoring Crabbie Moments of Craft their theme is Anything Goes & Halloween/Spellbound/Fairy Tales

I combined both Challenges into one card, a bit of 'two birds, one stone' theory

I have used 'Sassy Witch'


I coloured her using Copic Markers

Hair & Shoes: C10, C8, C6, C4
Skin: YG667, YG63, YG61
Lips: E09, E07, E04
Eyes: C4, C2
Dress & Hat: V09, V06, V01
Broom Handle: E35, E31
Broom Brush: E44, E43, E41


This 'Wicked' Halloween card fits the Halloween Theme perfectly then I tied in the Polka Dots using a stamp over a purple backing paper, Pearls I added to a Die-Cut under the topper.

I mixed it up a bit using Spider and Spiderweb stamps black in and some green distress inks.

The Sentiment Stamp is from Visible Image.

I chose these colours as they arent the traditional Halloween colours and I really like how they look together.

I added a Spider Charm using some jewellery wire.

I hope you like my card and that you will visit again soon

Krafty Hugs
Kerrie xx
Sassy DT

I am entering this card into the following challenges:

pennyschallenges.blogspot.co.uk - Polka Dots & Pearls
carabbiemomentsofcraft.blogspot.co.uk - Halloween/Spellbound/Fairy Tales
creativeknockouts.blogspot.ca  - Halloween

Saturday, 18 October 2014

Sassy Spooky New Release and Blog Hop

Eeeeeeks so excited such a brilliant post to get me started as a Design Team Member for Sassy Studio Designs a New Release Blog Hop

If you made it here from Our Lovely Guest DT Jamie's Blog then you are in the right place - if you have only just arrived please do start the hope from the beginning so you do not miss any of the gorgeous Design Team's Projects xx
 
The leaves have started to fall, the evenings are getting dark, Autumn is very much here but dont worry that means the fun of Halloween is near - and that is the theme of our New Sassy Images

Today we are showing off the New Sassy Images which you will be able to buy from the Sassy Studio Designs Shop

I have made a project using 'Monster Sassy - Medusa'


I coloured using my Copic Markers then added some depth to her face using Spectrum Noir Pencil


I added lots of layers and textures using a Halloween embossing folder, A circular diecut (from dark green mirror board), frayed burlap, cheese cloth and some diecut flourishes. I attached a mini glass bottle filled with little green gems and nail art caviar to look like a little bottle of potion. I have added some inky details using stamps and distress ink.

I hope you like my card and that you have fun on the Hop your next stop is the amazingly talented Misty's Blog

If you would like a chance to win all these wonderfully, sassy ghoulish creations be sure to visit and leave a comment on each design team members blog post as well as one on the Sassy Studio Designs blog and in the store over at http://sassystudiodesigns.blogspot.com
There will only be 1 winner so make sure to leave all your comments

We also be doing a live chat this evening, Saturday, October 18th 6pm to 8pm pst over at the party blog 

Thank You for visiting today
Krafty Hugs
Kerrie xx
Sassy DT

Guest Designer - Jamie Moore - http://craftygirl21.blogspot.com/

Tuesday, 12 August 2014

The Music Of The Night - Phantom of the Opera - for Inspired by a Song Challenge


I so so loved the theme of the Creata Challenge this time and thought I had missed the deadline to enter but thankfully not so I got to create the card I imagined when I saw the theme 'Inspired By A Song' check out the Challenge HERE!

The song I chose is.....'The Music Of The Night' from 'The Phantom of the Opera' my absolute fave Musical ever by the amazingly talented Andrew Lloyd Webber. You can find a link to the video I watched while planning and making my card below...

The Music Of The Night

To make this card I have used an Image of 'The Phantom' from Sassy Studio Designs you can get him HERE! you will need to scroll down a few images to find him.


I have coloured my Phantom using Copic Markers

Hair: E49, E39, E29
Eyes: YG67, YG63
Skin: E13, E00, E000
Lips: E04
Mask, Cravat & Cape Lining: C3, C1, 0
Waistcoat: R59, R39, R37
Jacket & Trousers: C9, C7, C5
Cloak: 100, C10, C8, C6
Shoes: 110, 100, C10

The Rules of Creata Challenge are you need to use at lease 1 Creata Product in your entry so I'm listing my Creata Products here:

Ruby Red Mirror Board
White Silky Cardstock
Hearts Entwined Die
Stage Curtains Die


I have used an 8x8 scalloped cardblank to make my card. I have used White Creata Silky Cardstock and Ruby Red Creata Mirror Board for the matt&layering behind the black background.

For the background I wanted to create a bit of Drama so I trimmed a piece of cardstock and then using some stamps and embossing powders I think I achieved the look I wanted.


The Chandelier Stamp is from Visible Image
The other various Music stamps are from an old Kanban set from my stash

I stamped the Chandelier's first at varying heights at the top of the Cardstock using a watermark inkpad then used white embossing powder and a heatgun. I did the same with the music notes, flourish and the piano keys. I stamped the music score stamp and the treble clef stamp using watermark inkpad and then used red tinsel embossing powder and a heatgun. I then fixed this panel to the Matt & Layered cardblank.

I die cut the Stage Curtains Die and the Entwined Hearts Die from Ruby Red Mirror board and then fixed to the cardfront along with the Phantom image that i fussy cut out


I am really pleased with how my card has turned out and I really hope you like it.

Why not visit the Creata Challenge and enter yourself there is a brilliant prize for the winner you can enter the challenge using the link below


 I would also like to enter this card into the following Challenges...


Thank you for visiting 
Krafty Hugs
Kerrie
x x

TCBOTB Background

Related Posts Plugin for WordPress, Blogger...