Hiya and welcome to my Tuesday post for Bee Crafty Stamps
I have been getting messy with some of my Inspired by Da Vinci stamps I brought with my pocket money a few weeks ago - I have a Need! list of new stamps for Payday im a bit addicted
For this card I have used....
Distress Ink Pads - Victorian Velvet, Tea Dye & Walnut Stain
White Pearlescent Cardstock
Watercolour Card
Pearlescent Textured Paper
6x6 Scallop Card Blank
Circular Frame Die
Waterbrush & Blending Tool
Paper Flowers - Cherry Blossom & Roses
Gems

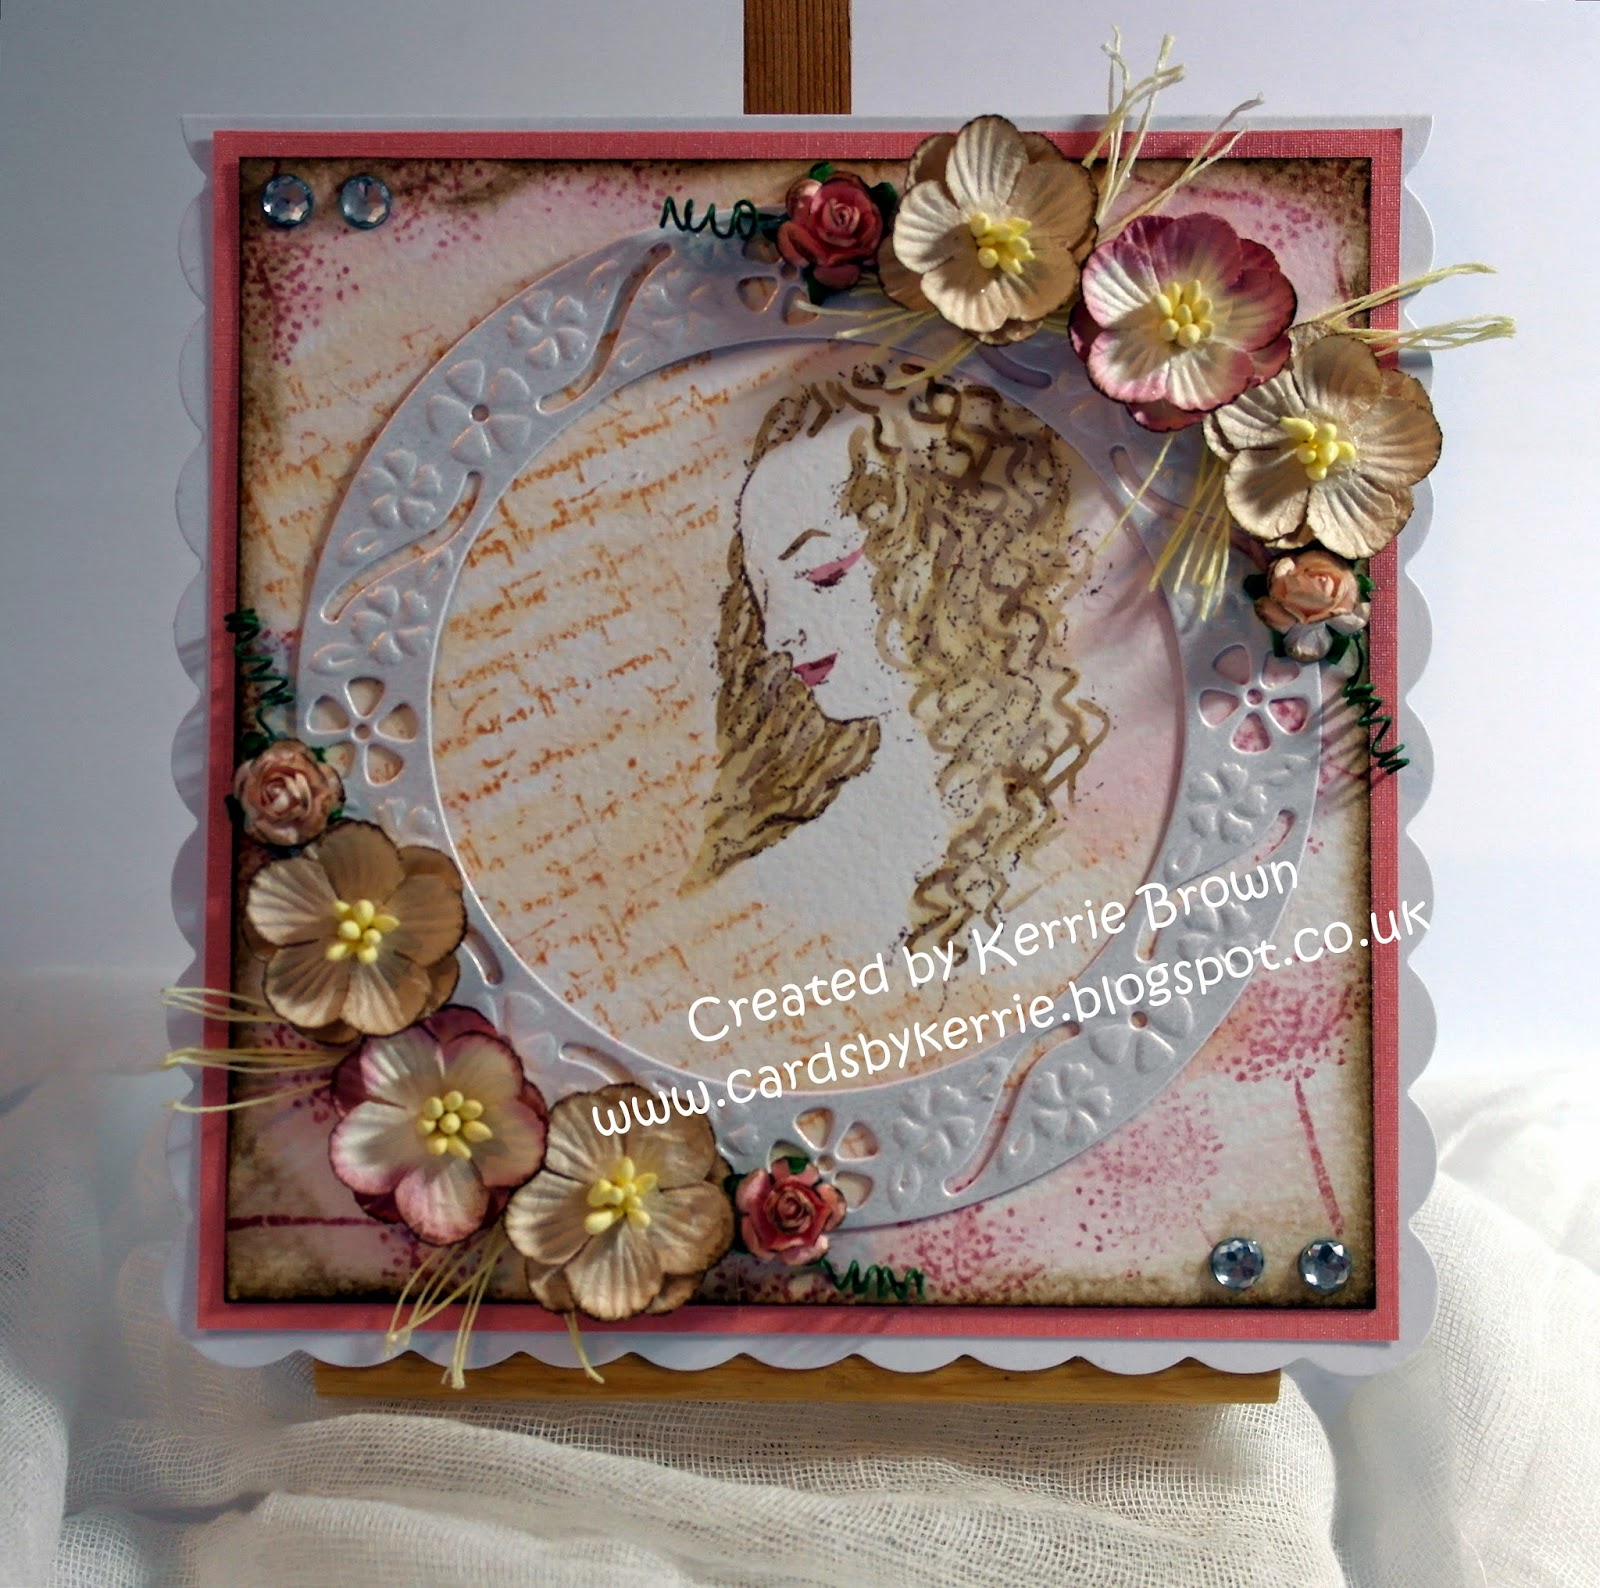
I
stamped Science of Beauty off-centred onto a trimmed piece of
watercolour card using Memento Ink 'Rich Cocoa' then stamped again onto
eclipse masking tape and cut around to form a mask which I fixed over
the stamped image on the card. I then inked up the Da Vinci Script using
Tye Dye distress ink and stamped twice over the edge of the mask to
create a script background. I inked up the Cow Parsley and stamped
around the edges of the card filling in all the gaps and stamping in
various directions. I then removed the mask to reveal no script has been
stamped accross her face. I used my waterbrush to wash over the
background blending the 2 colours slightly. I tapped the Walnut Stain
& Victorian Velvet ink pads onto my glass mat then using my
waterbrush to pick up the colour I painted her hair and features of her
face. I let this dry out while I prepared my paper flowers, first I
trimmed off the stems then inked the edges using Walnut Stain ink and my
blending tool.
I
trimmed a piece of pink pearlescent textured paper to a leave a few mm
border around the watercoloured picture and fixed this to the cardblank.
I inked the edges of the watercolour picture using Walnut Stain ink and
my blending tool and attached this to the card front. I die cut the
Circlular Frame using white pearlescent cardstock - I attached this over
Science of Beauty and most of the script to frame them using a glue
gun. I then arranged and fixed the flowers using the glue gun. I used
the stems to create foliage in between the flowers. I finished the Card
with some gems in the corners.

I hope you like my project and will visit again soon to see gorgeous makes by the Design Team Girls
Krafty Hugs xx