Hiya and welcome to my DT post for Paperbabe Stamps
Today we are Showcasing the Large Peony in Red Rubber over on the Paperbabe Stamps BLOG
This beautiful Flower is a larger and more detailed version of the Peony from the Oriental Zen stamp set and is available in Gorgeous Quality Red Rubber.
I have had a lot of fun playing with this Stamp which also has a pretty Bud Stamp included in the set
My first project today is a Clean & Simple Card I always find these cards a little harder as I tend to want to fill the card up with layers and embellies so making a card without I have to hold back
This gorgeous Stamp speaks for itself so I thought to show it off that I didnt really need to do much.
I Coloured onto the stamp using Distress Ink Markers in Fired Brick and Peeled Paint and stamped straight onto a pre trimmed piece of Watercolour Card, then using a Waterbrush I lightly painted the water over to created a watercoloured wash the detail of the stamp is gorgeous and still shows through.
All I did then was a simple layer of Mirror Board and fixed the topper to a 6x6 Card Blank. To finish I stamped the Thank You greeting stamp from 'Mayleedee - Little Red Hood' stamp set
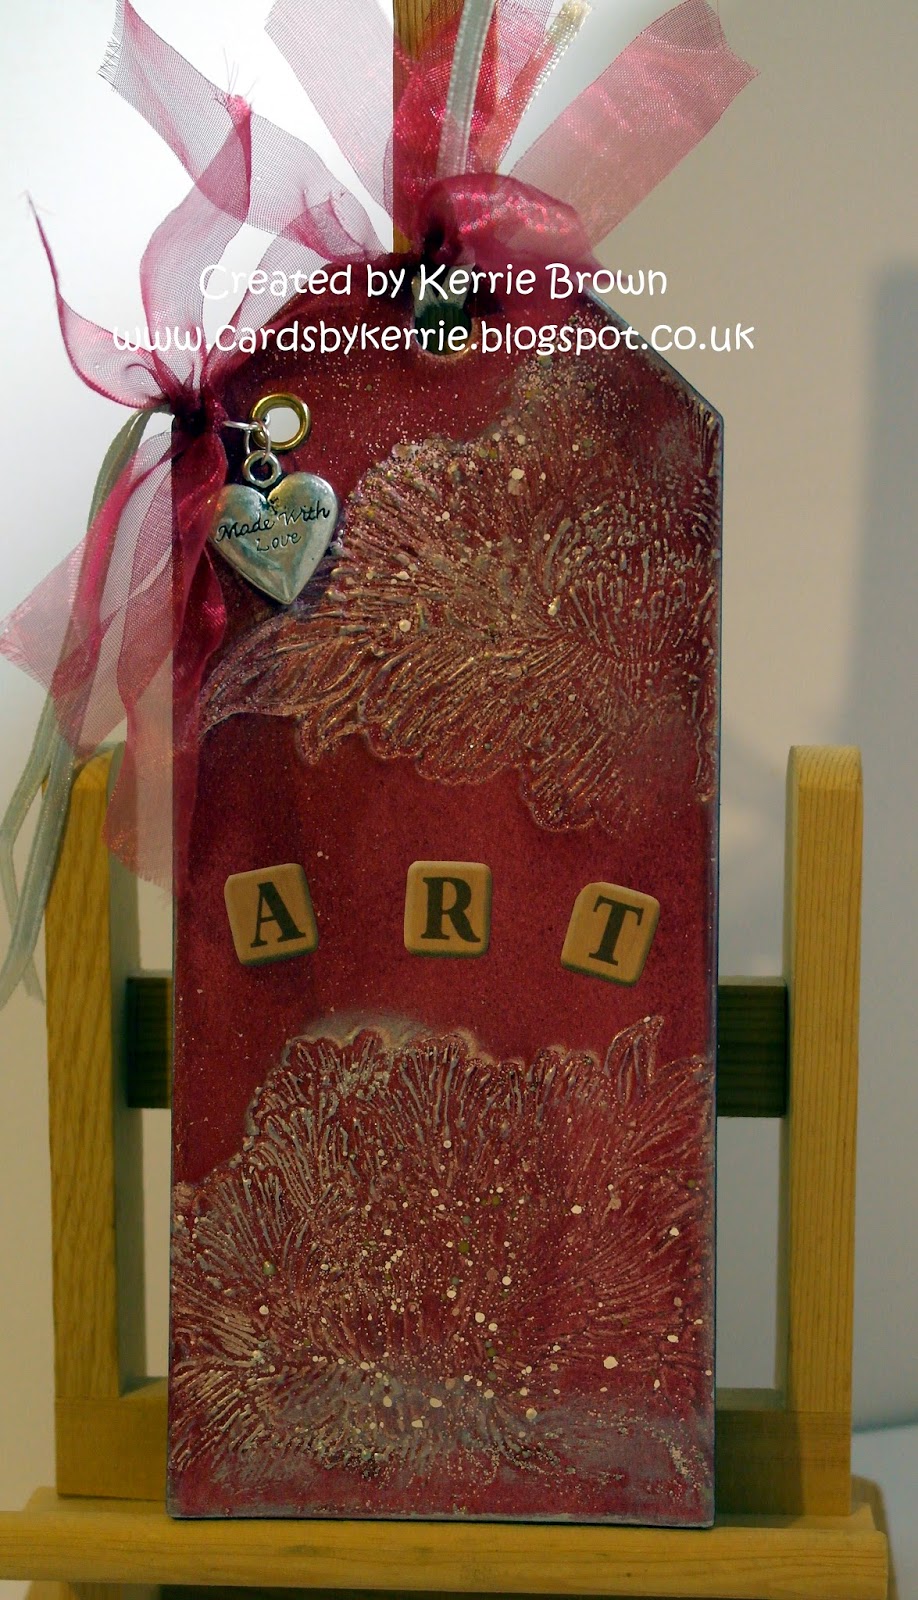
My second project today is a Tag which I have throughly enjoyed creating as it involved Messy embossing powder and my trusty old heat gun - The heat gun was the first item i ever brought when I started collecting my own craft stash after catching the Crafting Bug during Occupational Therapy in Hospital
I used 3 layers of embossing ink and Cranberry embossing powder to create a thick enamel type surface to my grey-board tag and then for a bit of texture and interest i sprinked on some Frantage embossing enamel in Aged Rose and Shabby Pink - I then heated the whole tag again. I tapped an embossing ink pad over the Peony Stamp and pressed it down onto the hot embossing powders to create an imprint - I then heated the top of the tag and pressed the oposite side of the peony stamp into the embossing powders again.
Once the tag was cooled I rubbed a little guilding wax over the texture of the Peony's and around the outside edge of the tag.
Using a Dark Grey alcohol marker i coloured the edges of the tag so none of the grey-board was visible - I coloured the back of the tag too.
To finish the tag I punched a hole at the top edge below the existing pre-punched tag hole so that I could add a 'Handmade with Love' charm. I tied a few ribbons through the 2 holes. I also added a few Scrabble Tile embellishments to spell ART.
I hope you like my projects today they are a little different to my usual makes but thats what I love about crafting you can try something new and also fall in love with old techniques again
Don't forget to head on over to Paperbabe Stamps BLOG to see more about the New Stamp Set from our Kim and links to the Design Team Projects
Krafty Hugs
Kerrie xx
Paperbabe DT


No comments:
Post a Comment