Followers

Showing posts with label Chalky Paint. Show all posts

Monday, 16 January 2017

Decision To Try - Canvas - for Bee Crafty Stamps

Hiya and Welcome to my Monday Post for Bee Crafty Stamps

Today I am sharing with you a recent make for one of the Hochanda Shows that I have not Blogged about before... my Mixed Media Canvas

The Bee Crafty Products I used on this project are...


First I covered the canvas with white gesso, Once dry, I trimmed a piece of old music from a piano book and glued this to the canvas and then painted over again using white gesso. I made sure that the gesso was applied thinly so that the music notes could still be seen. Next I painted over with a coat of Magnolia Chalky Paint and left to dry fully.

On a piece of thin corrugated card I drew around the inside and outside of  the 6" Square Inkables Template which I then cut out to create a frame, I covered this frame using music score paper and then I used filler to seal in the corrugated edges and painted over a coat of white gesso. Once dry I painted over the frame again using Mink Chalky Paint and left to dry fully.

Once both pieces were fully dry I used a strong white glue to stick the frame to the canvas at a jaunty angle. I then used filler through the 4" Heart Inkables Template to place hearts inside and outside of the frame and around the canvas. I used a heat gun to speed up the drying process so that I could then paint the Hearts using Damson Chalky Paint.

Next I stamped the Style Wire Border around the edges of the frame, and the Lines & Dots Texture onto the canvas. I then stamped the Decission To Try WORDage onto white cardstock, which I then cut the scetions of the sentiment out, backed them with dark gold mirror board and attached to the canvas inside the frame using a hot glue gun spreading the words out over the space. I picked out some paper flowers, wooden buttons and metal embellishments (one being a little Bee for Bee Crafty... just cause I can) I fixed them into opposite corners of the frame using a hot glue gun.

To seal and varnish the project I painted over everything using Mod Podge.

Thank You so much for visiting my Post today - Please visit again soon to see more from the Amazing Bee Crafty Design Team

Krafty Hugs xx

Tuesday, 23 August 2016

Hiya this week over at Paperbabe Stamps we are having a 'Picture Inspiration' Challenge.
Your make should be inspired by the picture below. You can use the colours, the shapes or the theme but as long as your make is inspired by the picture then pretty much anything goes


The prize for the challenge is amazing but even more so if you use a Paperbabe Product in your entry project. So please do go and check out the Paperbabe Blog to see all the details - we would love to see all your gorgeous makes


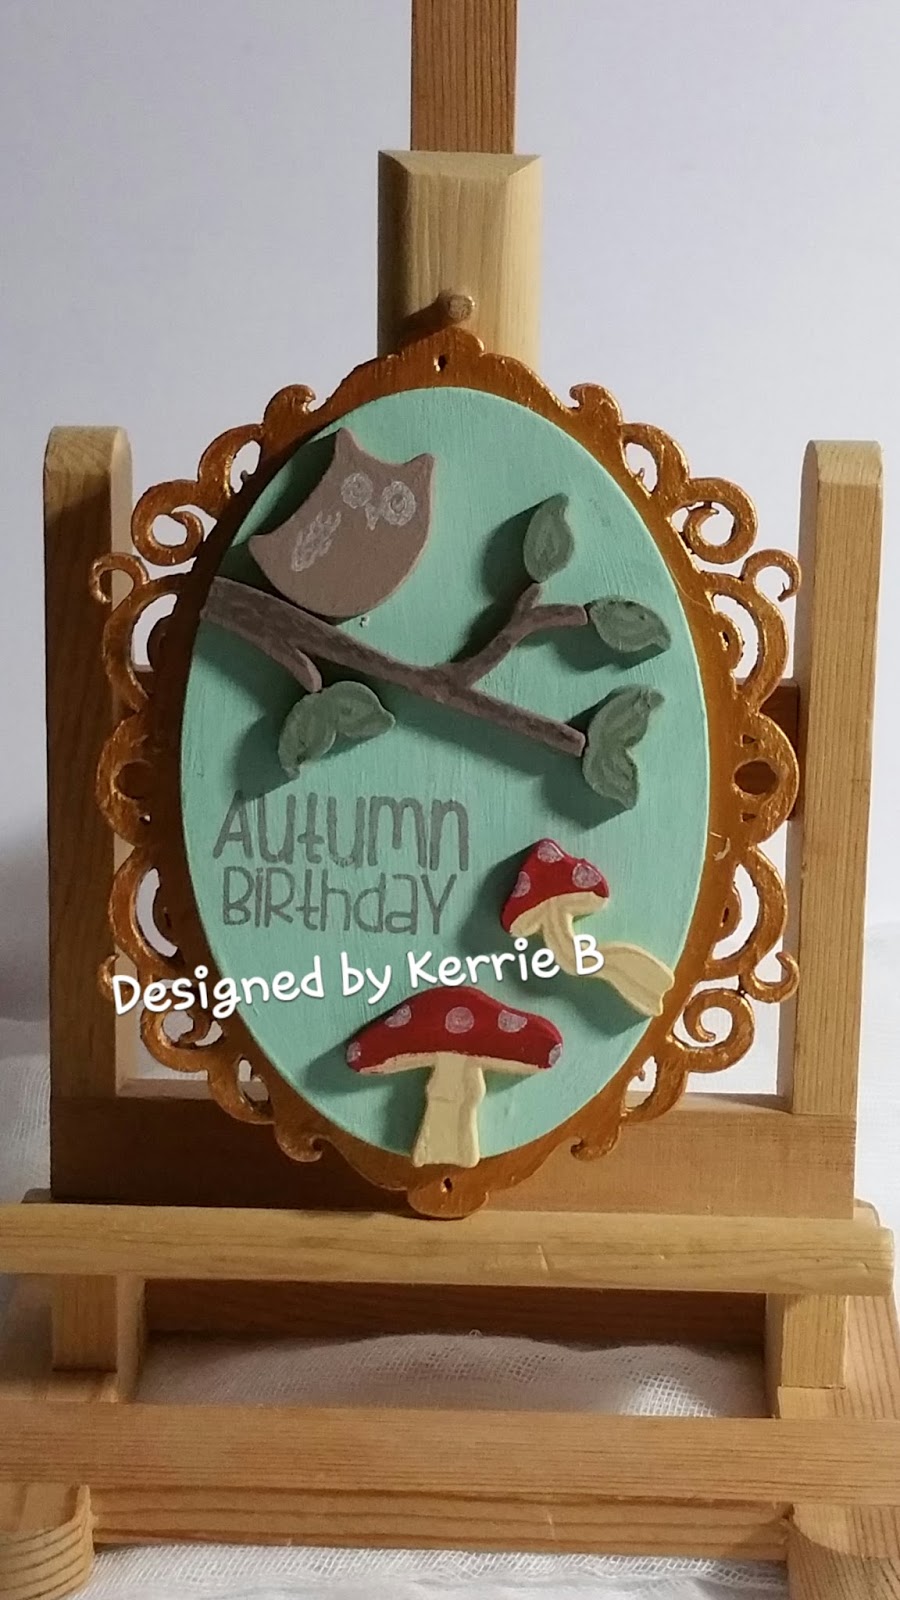
For my make I have used some of the Mixed Media MDF Substrates - the Whimsical Woodland set and the Ornate Frame Oval kit painted first with gesso and then with chalky paints and gold acryllic paint to create her mini hanging plaque.

Which will now be pride of place on my wall in 'Kerrie's Kraft Korner'.


I also stamped the details using a mixture of coloured inks aswell as the matching stamps from the 'Whimsical Woodland Owl' and the 'Whimisical Woodland Butterfly' sets.

Thank you so much for visiting my Blog today please leave a comment so I know you have been and visit again soon for more makes from me 

Krafty Hugs

Monday, 17 August 2015

Kerrie DT - Artsy with Inkables & DaVinci Script

Hiya and welcome to my Monday Post for Bee Crafty
I have been away with no Internet Access it was a bit of a nightmare to be without but the Family Holiday was Fun
So I am back this week with a Mixed Media Artsy Make using 3 of my Favourite Inkables Templates and the DaVinci Script Stamp
For this project I upcycled the chipboard from the back of an art sketch pad - I love making projects with these as I hate throwing anything away if I can help it
First I painted the board using white chalk paint - then I chose my 3 Inkables Templates and used polyfiller and a scraper through the templates - 'Love' in the middle, the corners with 'Circles' and 'Metalwork Alpha' - once dry I coated the whole board using Gesso. I then applied Teal and Powder Pink chalky paint using small sponges randomly for just a hint of colour, I then sponge dabbed Charcoal Grey chalky paint to add like an aged effect. I also used a small paintbrush to apply some Charcoal Grey paint around the letters of 'Love' to add shadows so the lettering stands out against the background. Using an Archival Ink Pad I randomly stamped the 'DaVinci Script' stamp. To add texture I rubbed a candle over the whole board then heated with a heat tool and sanded it back a bit over the raised parts of the Artsy Project - this brought out some of the white from underneath. I rubbed Silver Guilding Wax over to create a metallic look almost like this project was created from embossed metal. To finish I painted over the whole project with Mod Podge to seal it.
I really like how this project turned out - I'm getting a bit more confident now with Mixed Media which was something I hadnt really done much of before this year as I was always a bit terrified but I have learnt that there is no wrong and its the enjoyment of making the project that is the most important thing being free to let go and try out new ideas and push that comfort zone 
Thank You so much for visiting my Post today and I hope you will visit the Bee Crafty Blog soon for more Amazing Projects by the Gorgeous Design Team
Krafty Hugs xx

Friday, 8 May 2015

Banksy - Greatness Girl - for Bee Crafty

Hiya and welcome to my Friday post for Bee Crafty
This week I got inspired by and inky/textured piece I saw on pinterest - So I chose to use some polyfiller, inks and one of my New Stamps 'Banksy - Greatness Girl', I really like this stamp and I think this brickwork template was a good choice for the background

First I cut a piece of watercolour cardstock to a few mm smaller than my 7x7 card blank. I love the texture of watercolour card and to bring this out I ran a distress ink pad in 'Antique Linen' over the cardstock. I then chose a brickwork template and applied polyfiller with a small pallet knife, not over the whole of the cardstock but roughly through the middle for an exposed brickwork look.
After letting the polyfiller dry I used a sponge and lemon juice around the edges of the card and to stamp the 'Large Branch' over the top left corner. I dried the lemon juice with a heat gun because when heated with a heat gun the lemon juice burns nicely to create a dark aged effect (smells nice too).


I stamped 'Greatness Girl' using archival ink - and the stamp is so great I got a perfect imprint even over the texture.


I inked through the 'Metal Work Alpha' inkable template using Black Soot distress ink to add to the graphitti look of the project. I also inked the edges using the Black Soot ink. I handpainted some ground under her feet using Chalky Finish paint in charcoal.
To finish the project I painted on mod podge, waited for it to dry and then fixed the project to mirror board before attaching to the card blank.
Thank you so much for visiting my post today - remember to visit again soon for more gorgeous projects by the Amazing Design Team.
Krafty Hugs xx

Sunday, 12 April 2015

Alter Something - That Craft Place

Hiya and welcome to my Blog

Today a New Challenge begins over at the That Craft Place Blog and the theme is Alter Something. The Design Team have all created stunning works of art for you all to see, pen pots, bottles, wall arts and lots of other amazing things - I really love the Altered Mouse Trap I would never have thought to use one of those.

I wanted to try something new so I used an empty coffee jar - that famous brand with the beautiful pull top jars that I and many other crafters collect - I had a spare and this was the perfect project to use it for.


First I painted the jar using Clear Gesso (I dont have any others yet) let this dry, then painted over using Pink Chalky Paint this time drying with a heat gun and it crackled lightly which was lovely, I rubbed a candle over some parts and painted over again using White Chalky Paint. Once dry I rubbed lightly over the waxed parts with light sand paper to reveal some of the pink paint underneath. I then painted over the jar using Mod Podge sealer.

I chose some paper from a 12x12 pad from the Papermania 'Capsule' range I trimmed a piece to wrap around the jar, I inked the edges using 'Pumice Stone' distress ink. Using Mod Podge as a glue to fix the paper over the jar and then as a varnish to seal the paper. 

I wrapped around some crochet lace using Mod Podge again like a glue and a varnish. I attached a string of pearls around the lid and fixed a fabric flower, crochet flower and a large flatback pearl onto the top of the lid.

I finished the decoration with a piece of spotty organza ribbon tied around the jar and a wooden button.


Everything I have used except from the Jar is available from Lisa's shop That Craft Place which is a bricks and mortar shop but also a Facebook Group/Shop so why not check out all the lushness the shop has to offer by following the link below...


Thank you so much for visiting today 

Krafty Hugs xx


TCBOTB Background

Related Posts Plugin for WordPress, Blogger...