Followers

Showing posts with label Da Vinci. Show all posts

Monday, 17 August 2015

Kerrie DT - Artsy with Inkables & DaVinci Script

Hiya and welcome to my Monday Post for Bee Crafty
I have been away with no Internet Access it was a bit of a nightmare to be without but the Family Holiday was Fun
So I am back this week with a Mixed Media Artsy Make using 3 of my Favourite Inkables Templates and the DaVinci Script Stamp
For this project I upcycled the chipboard from the back of an art sketch pad - I love making projects with these as I hate throwing anything away if I can help it
First I painted the board using white chalk paint - then I chose my 3 Inkables Templates and used polyfiller and a scraper through the templates - 'Love' in the middle, the corners with 'Circles' and 'Metalwork Alpha' - once dry I coated the whole board using Gesso. I then applied Teal and Powder Pink chalky paint using small sponges randomly for just a hint of colour, I then sponge dabbed Charcoal Grey chalky paint to add like an aged effect. I also used a small paintbrush to apply some Charcoal Grey paint around the letters of 'Love' to add shadows so the lettering stands out against the background. Using an Archival Ink Pad I randomly stamped the 'DaVinci Script' stamp. To add texture I rubbed a candle over the whole board then heated with a heat tool and sanded it back a bit over the raised parts of the Artsy Project - this brought out some of the white from underneath. I rubbed Silver Guilding Wax over to create a metallic look almost like this project was created from embossed metal. To finish I painted over the whole project with Mod Podge to seal it.
I really like how this project turned out - I'm getting a bit more confident now with Mixed Media which was something I hadnt really done much of before this year as I was always a bit terrified but I have learnt that there is no wrong and its the enjoyment of making the project that is the most important thing being free to let go and try out new ideas and push that comfort zone 
Thank You so much for visiting my Post today and I hope you will visit the Bee Crafty Blog soon for more Amazing Projects by the Gorgeous Design Team
Krafty Hugs xx
Friday, 17 April 2015

Tin Man - Art Tag - Tin Man - Design Team for Bee Crafty

Hiya and welcome to my Friday post for Bee Crafty
This week I have made a Tag using a few of my fave stamps
Bee Crafty stamps I have used are...
They are all available from the Bee Crafty STORE along with lots of other yummy products

First I stamped the Tin Man using grey ink into the centre of the tag, I then stamped again onto a piece of wide tape from my masking roll, which I cut around the Tin Man shape to make a mask. I was the Tin Man un-coloured for later
Next I stamped the Backdrops Border - Clover using clear embossing ink accross the bottom of the tag just touching the Tin Man's feet. I used silver embossing powder tipped over the front, tapped of excess powder and heated with a heat gun
Then I stamped the 'Da Vinci - Script' stamp over the whole tag using clear embossing ink and then used 'clear' embossing powder and heat embossed - the tag is very textured now with raised areas. I inked over using 'Weathered Wood' and 'Pumice Stone' Distress Inks over the tag
I used the leaf stamps from the 'BEAUtanicals - Maple Solid' to randomly stamp in the corners and down the sides of the tag
I added some random stamping of the 'BEAUtanicals - Cow Parsley' stamp in between the leaves. I took the masking tape off the tag to reveal the un-coloured Tin Man
I stamped the 'WORDage - Being Happy' off the edge of the tag so only the 'look beyond the Imperfections' line was on the tag. I heat embossed using silver embossing powder
I ran the clear ink pad over the tag edges and dipped into black embossing powder and heated with an embossing gun
I coloured the Tin Man using Alcohol Markers
Thank you for visiting today and I hope you come back soon to see more makes by me
Hugs Kerrie x x

Friday, 27 March 2015

Dreams Come True - Bee Crafty DT Make

Hiya and welcome to my Friday post for Bee Crafty which is now my weekly posting day on the
Bee Crafty Blog
This week I got inky and messy with a load of my fave Bee Crafty stamps along with distress inks and embossing powder it was a lot of fun


The Bee Crafty stamps I have used are...
I trimmed a piece of gold Mirror Board to a few mm smaller than my 8x8 cardblank - I measure up against the card and make with a pencil at the length and width I like by eye then trim using a guilotine. I then did the same using a piece of patterned cardstock. I embossed the cardstock using a Burlap embossing folder and my die-cutting machine. Inked the edges of the cardstock using 'Frayed Burlap' Distress Ink and a mini round inking tool I also edged the cardstock with a dark brown alcohol marker
I fixed the gold Mirror Board to the cardblank using a strong glue and then fixed the embossed panel onto the card front using narrow foam tape

Next I trimmed a piece of watecolour card to about a cm smaller than the embossed panel all the way around then chose my inks and stamps to use
I stamped the 'Bubble Wrap' stamp using versamark ink, tipped clear embossing powder over, tapped off excess then heated with a heat gun leaving a glossy image on the card. I randomly stamped the 'Script', 'Maple' leaves 'Cow Parsley' and 'Branches' stamps around the edges and working in towards the centre with distress inks 'Tattered Rose', 'Victorian Velvet', 'Frayed Burlap' and 'Pumice Stone' - I wiped over the bubble wrap areas to reveal the uninked embossed areas. I inked the edges using 'Tattered Rose' and 'Frayed Burlap' inks I edged the card using a dark brown alcohol marker to match the other layer. Once dry I fixed the watercolour card panel to the card front

I was going to use one of the Fashionista's but after seeing how the background came out I thought it would be a shame to cover most of it - so I opted for a lovely sentiment instead I stamped the sentiment using brown ink and then using the Branches, Cow Parsley and Script stamps and similar random stamping as the background piece, inked edges and the matted onto gold Mirror Board. I fixed this topper I created to the cardfront using narrow foam tape

I really like how this one turned out and was a nice boost to my mucking crafting Mojo

Thank You so much for visiting the my blog today 

Krafty Hugs xx

Tuesday, 17 March 2015

BEAUtanicals - 'Dandelion' - Bee Crafty

Hiya and welcome to my Tuesday post for Bee Crafty 
For my card today I have used a mixture of my favourite Bee Crafty polymer stamps

I stamped the Script stamp over the background using 'Pumice Stone' distress ink, then the Bubble Wrap stamp into the corners using 'Walnut Stain' distress ink.
Using 'Spun Sugar' distress ink using one of the small round blending tool in circular motions darker into the corners and lighter around the sides, then using a piece of blending sponge i inked the edges using 'Walnut Stain' distress ink.
I stamped the Bubble Wrap again using White chalky paint 


I stamped the Dandelion using 'Black Soot' distress ink, then stamped just the blown away seeds randomly around the outside of the card. Using 'Black Soot' again I stamped the Being Happy sentiment near the corner.


I have used some Pink textured cardstock and some Mink mirror board from my stash for the layers and before i fixed the stamped section I inked over all the edges of the layers and card blank using 'Spun Sugar' distress ink.

Thank you for visiting today please do visit again soon to see more Bee Crafty makes from the team 
Krafty Hugs xx

Tuesday, 24 February 2015

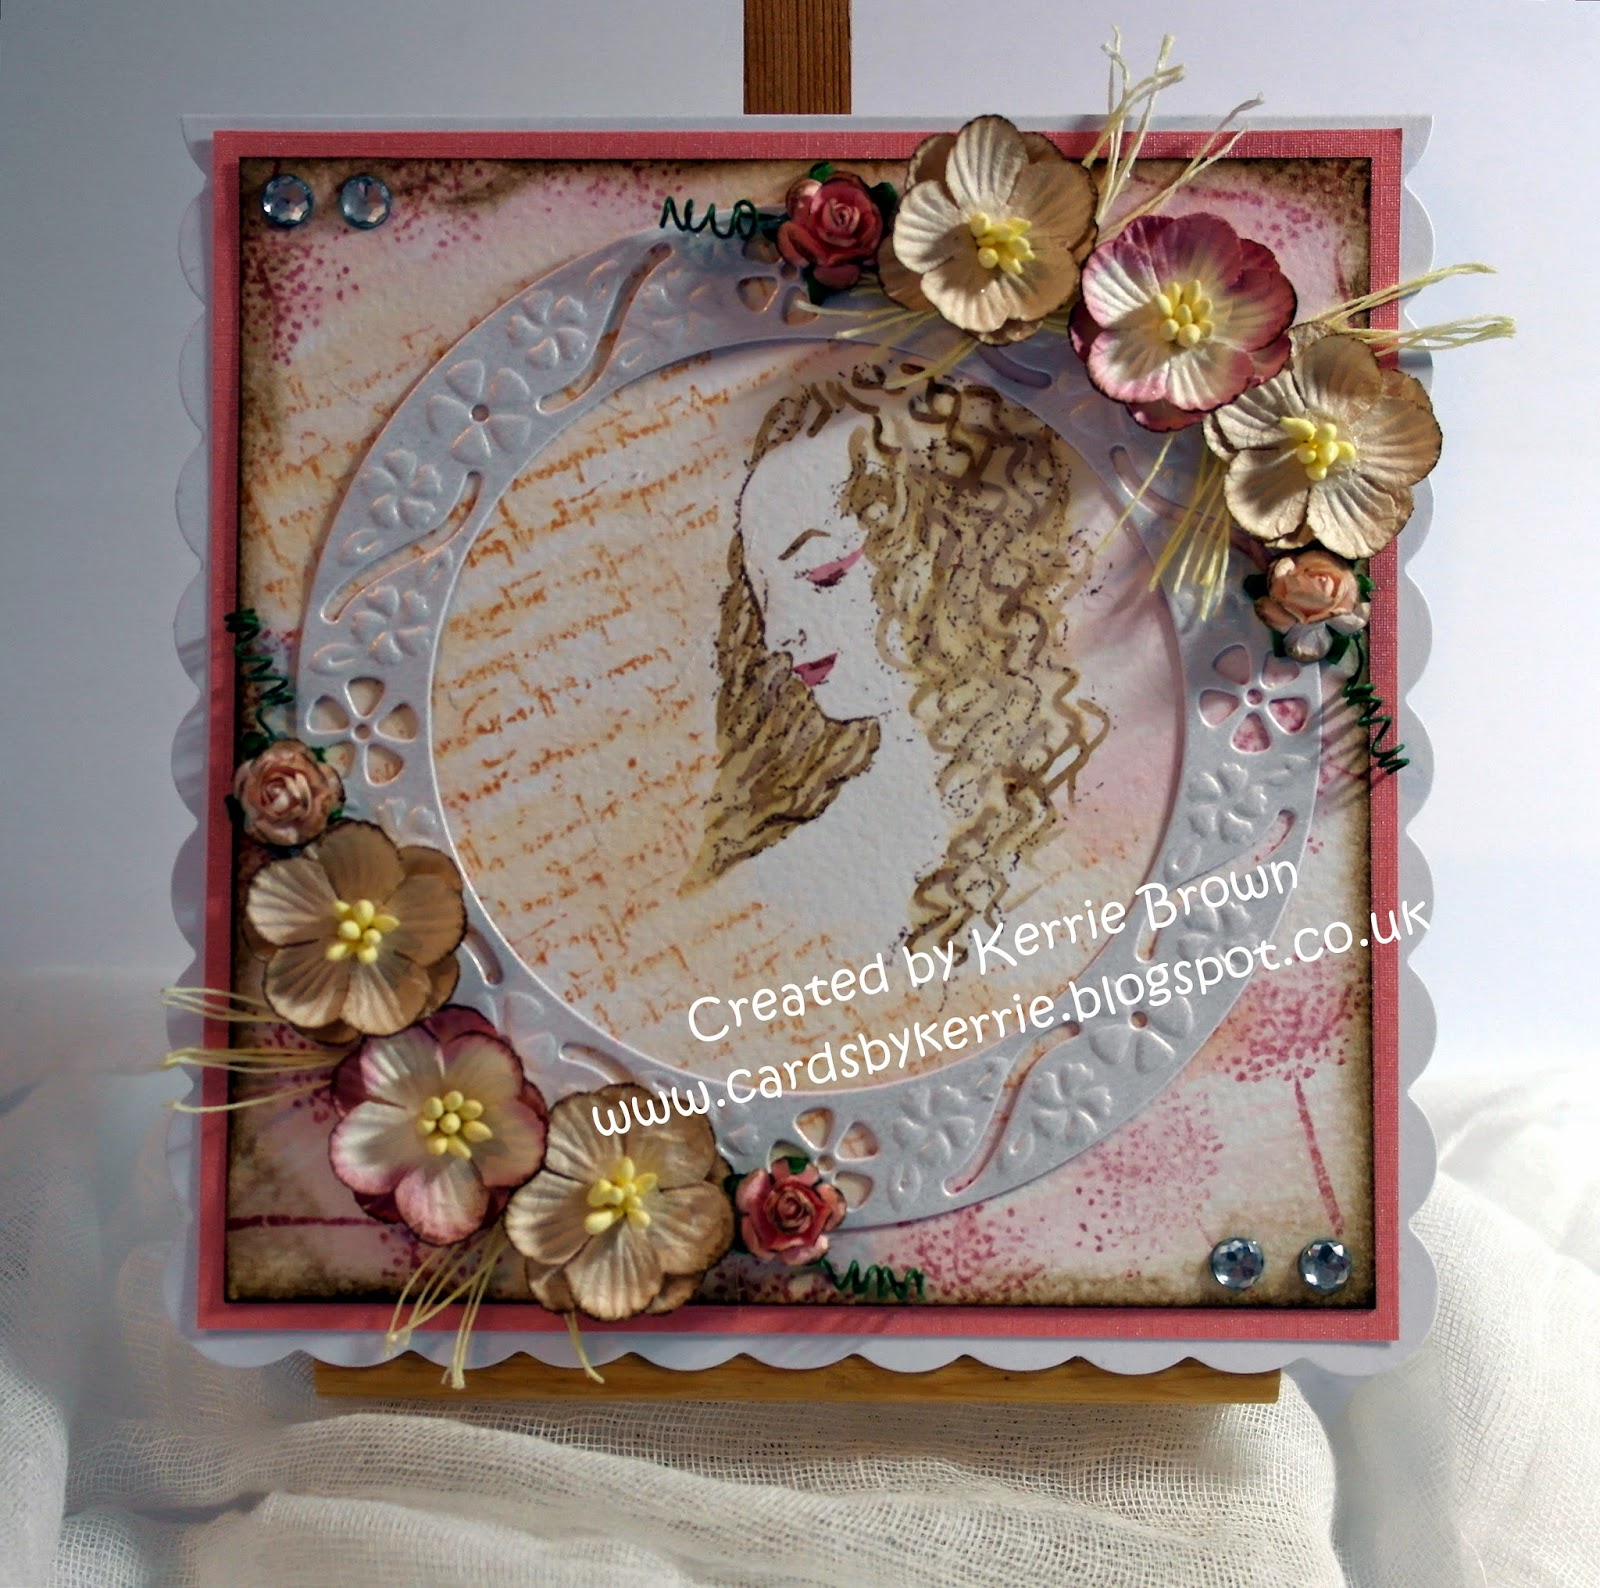
Science of Beauty - Inspired by Da Vinci - Bee Crafty Stamps DT

Hiya and welcome to my Tuesday post for Bee Crafty Stamps

I have been getting messy with some of my Inspired by Da Vinci stamps I brought with my pocket money a few weeks ago - I have a Need! list of  new stamps for Payday im a bit addicted 


For this card I have used....


Distress Ink Pads - Victorian Velvet, Tea Dye & Walnut Stain

White Pearlescent Cardstock

Watercolour Card

Pearlescent Textured Paper

6x6 Scallop Card Blank

Circular Frame Die

Waterbrush & Blending Tool

Paper Flowers - Cherry Blossom & Roses

Gems


I stamped Science of Beauty off-centred onto a trimmed piece of watercolour card using Memento Ink 'Rich Cocoa' then stamped again onto eclipse masking tape and cut around to form a mask which I fixed over the stamped image on the card. I then inked up the Da Vinci Script using Tye Dye distress ink and stamped twice over the edge of the mask to create a script background. I inked up the Cow Parsley and stamped around the edges of the card filling in all the gaps and stamping in various directions. I then removed the mask to reveal no script has been stamped accross her face. I used my waterbrush to wash over the background blending the 2 colours slightly. I tapped the Walnut Stain & Victorian Velvet ink pads onto my glass mat then using my waterbrush to pick up the colour I painted her hair and features of her face. I let this dry out while I prepared my paper flowers, first I trimmed off the stems then inked the edges using Walnut Stain ink and my blending tool. 

I trimmed a piece of pink pearlescent textured paper to a leave a few mm border around the watercoloured picture and fixed this to the cardblank. I inked the edges of the watercolour picture using Walnut Stain ink and my blending tool and attached this to the card front. I die cut the Circlular Frame using white pearlescent cardstock - I attached this over Science of Beauty and most of the script to frame them using a glue gun. I then arranged and fixed the flowers using the glue gun. I used the stems to create foliage in between the flowers. I finished the Card with some gems in the corners.


I hope you like my project and will visit again soon to see gorgeous makes by the Design Team Girls

Krafty Hugs xx


TCBOTB Background

Related Posts Plugin for WordPress, Blogger...