Followers

Showing posts with label Watercolour Card. Show all posts

Monday, 20 June 2016

Brusho's - Wordage - Tags - For Bee Crafty

Happy Monday to you all and welcome to my Post for Bee Crafty

What a Crazy Weekend with Father's Day I hope you all had a lovely time with your families. I did with my Wonderful Hubby and our Children and his Parents we all had a lovely roast dinner and a Movie Night

I had the first bit of spending money available for a while so I visited ordered some Brusho's from Bee Crafty I have never used these before and so I had to open them up and try them out, so I created some Tags with them 


I used Watercolour Card cut into Tag Shapes, sprayed them with a water spritz spray bottle and then sprinkled over some of the Brusho's after making holes in the lids for ease of use - I teamed these with some Distress Inks

For the Blue/Green tag once dry I inked some leaves through the 'Leaves - Inkables Template' using Black Soot distress ink then inked the edges using the same ink. I stames the 'Life & Rain (large) - WORDage' stamp in the corner using Black Archival Ink. I trimmed a piece of linen cardstock a few mm larger than the tag to create a matt, I then inked the egdes using 'Peacock Feathers' and 'Black Soot' distress inks then glued the tag to it

For the Red/Brown tag once dried I stamped the 'Friendship (large) - WORDage' stamp into the corner of the tag using Brown Archival Ink. I inked the edges of the tag using 'Vintage Photo' distress ink. I then trimmed a piece of linen cardstock a few mm larger than the tag to create a matt, I then inked the egdes using 'Scattered Straw' and 'Vintage Photo' distress inks and then glued the tag to it

I had best leave this post here and get back to Sample Making for the upcoming Hochanda Shows at the Weekend where Bev will be showing off some New Stamps....eeeeks so exciting

Thank You so much for visiting the Bee Crafty Blog today please do visit again soon to see more Gorgeous makes from the Amazing Design Team

Krafty Hugs xx


Friday, 16 October 2015

Paperbabe Stamps - Arctic Jumper

Hiya and Welcome to my Blog

Today over at Paperbabe Stamps Etsy Store the New Christmas Stamps are now available and I know you will love them as much as I do they are so so lush

I was unable to share with you my make for 'Arctic Jumper' on Thursday as Planned so I am sharing him today instead - This stamp set is so so cute and will be perfect for making many cards for this years Festive Season as he would be great at a complete cardfront so cards could be made very quickly


I have used one of my favourite cardstocks for this make 'Watercolour Card' I love the texture but also that I can use water and distress inks on it with no fear of puckering

I stamped the Holly Leaves and Berries from the set onto a piece of the watercolour card randomly around the edges and towards the centre but no all the way so to prevent wasting Ink as I knew I was to cover the centre later with the topper - I used 'Pine Needles', 'Bundled Sage' & 'Fired Brick' Distress Inks.

To create the topper I stamped the main 'Arctic Jumper' stamp onto another piece of watercolour card and painted him using Distress Inks and a Waterbrush. I stamped Holly Leaves and Berries in the corners. I stamped the 'Winter Hugs' stamp from the set into the Scroll.

I used Gold Pearlescent Cardstock for all the Matts and Layers

I know I will be making lots of cards using this stamp set this Christmas

Thank You so much for Visiting my Blog today and I do hope you will stop by the Paperbabe Stamps Etsy Store today to see the New Stamps and all the other Gorgeous Products that available

Krafty Hugs xx


Thursday, 16 July 2015

Watercolour and You Quotes - Paperbabe

Hiya and welcome to my Blog

Today over at Paperbabe Stamps Blog we are introducing you to the New You Quote Stamps in red rubber that will be available to buy over at the Paperbabe Etsy Store on Saturday 

I have used 2 of the 'You' set of Quotes in my watercoloured piece I teamed them up with the 'Because' from the 'Just Because' clear stamp set

I have used a mix of traditional watercolours and twinkling h2o's - the doll face picture was drawn using the 'Doll Face' Clear Stamp Set and the 'Portait Head & Torso' and the 'Short & Fringe' Mixed Media Templates 


The background I created using 3 shade of green/aqua h2o's and some table salt sprinkled on and left to dry

I added shading to her hair using a dark brown copic marker

I do hope you like my Project and will head on over to the Paperbabe Stamps Blog to see the gorgeous creation by our Kim and follow the links to the Design Team blogs to see the beautiful creations from all the girls xx

Krafty Hugs xx

Friday, 1 May 2015

FASHIONettes 'Peggy' - Decision to Try - Bee Crafty

Happy Friday so its my turn to post for Bee Crafty
I ordered some new Stamps & Inkables Templates in the last 2 weeks and couldnt wait to get inky - I love the FASHIONette's so much and I've been eager to try out the templates with my Distress Inks

I stamped 'Peggy' onto watercolour cardstock (which I had trimmed to fit an 8x8 cardblank with a few mm border) using Archival Ink because I wated to use lots of water and didnt want the image to bleed. I then stamped again onto eclipse masking tape and cut her out to make a mask which I fixed over her on the watercolour cardstock.

The background I created by blending 'Antique Linen' & 'Tattered Rose' distress inks using a round blending tool. I then placed the 'Circles' inkables template over the corners and sprayed through with water, then used a 'microfibre cloth' to remove the excess water and lift the colour away from the wet areas too. this showed up quite faint though as the colours I used were a bit pale.

Next I used the 'Metalwork Alpha' inkables template around the edges using 'Victorian Velvet' distress ink. I inked the edges using 'Pumice Stone' distress ink. I sprinkled over some rock salt and sprayed with water, waited for the salt to react a bit then dried the card using a heat gun on a low setting. I brushed the salt off to reveal the speckles where it had reacted with the ink.

Next I stamped the 'Maple Outline' stamps slightly off the page and painted over them using 'Pumice Stone' distress ink. I also randomly stamped the 'Large Branch' BEAUtanicals stamp accross the top of the card and 'Dandies' Backdrop Border stamp along the bottom of the card using 'Frayed Burlap' distress ink.

I also randomly stamped the 'Cow Parsley' & 'Branches' BEAUtanicals stamps randomly using 'Tattered Rose' & 'Victorian Velvet' around the edge of the card.

I reused the 'Circles' inkables template around the corners again dry template this time using 'Antique Linen' distress ink and the round blending tool, this showed up a lot better with the paler colours.


I then removed the mask from 'Peggy' which revealed that no ink had slipped through and she was perfectly blank for me to add colour to. I used Distress Inks as watercolours using a blending mat and a waterbrush. The colours I used were all the same ones from the background.

I matted the finished picture onto dark brown mirror board and attached to my 8x8 cardbalnk using foam tape.

 
Lastly I stamped the 'Decision to Try' WORDage stamp onto an offcut of watercolour card using the 'Pumpice Stone' ink, I then trimmed the words out and matted them onto dark brown mirror board, I then fixed them to the finished card using foam tape for dimension.
Thank you for visiting today, dont forget to check back soon for more gorgeous makes by the Brilliant Design Team and stop by the 'Bee Crafty Facebook Group' to join in the fun
Krafty Hugs xx

Tuesday, 24 February 2015

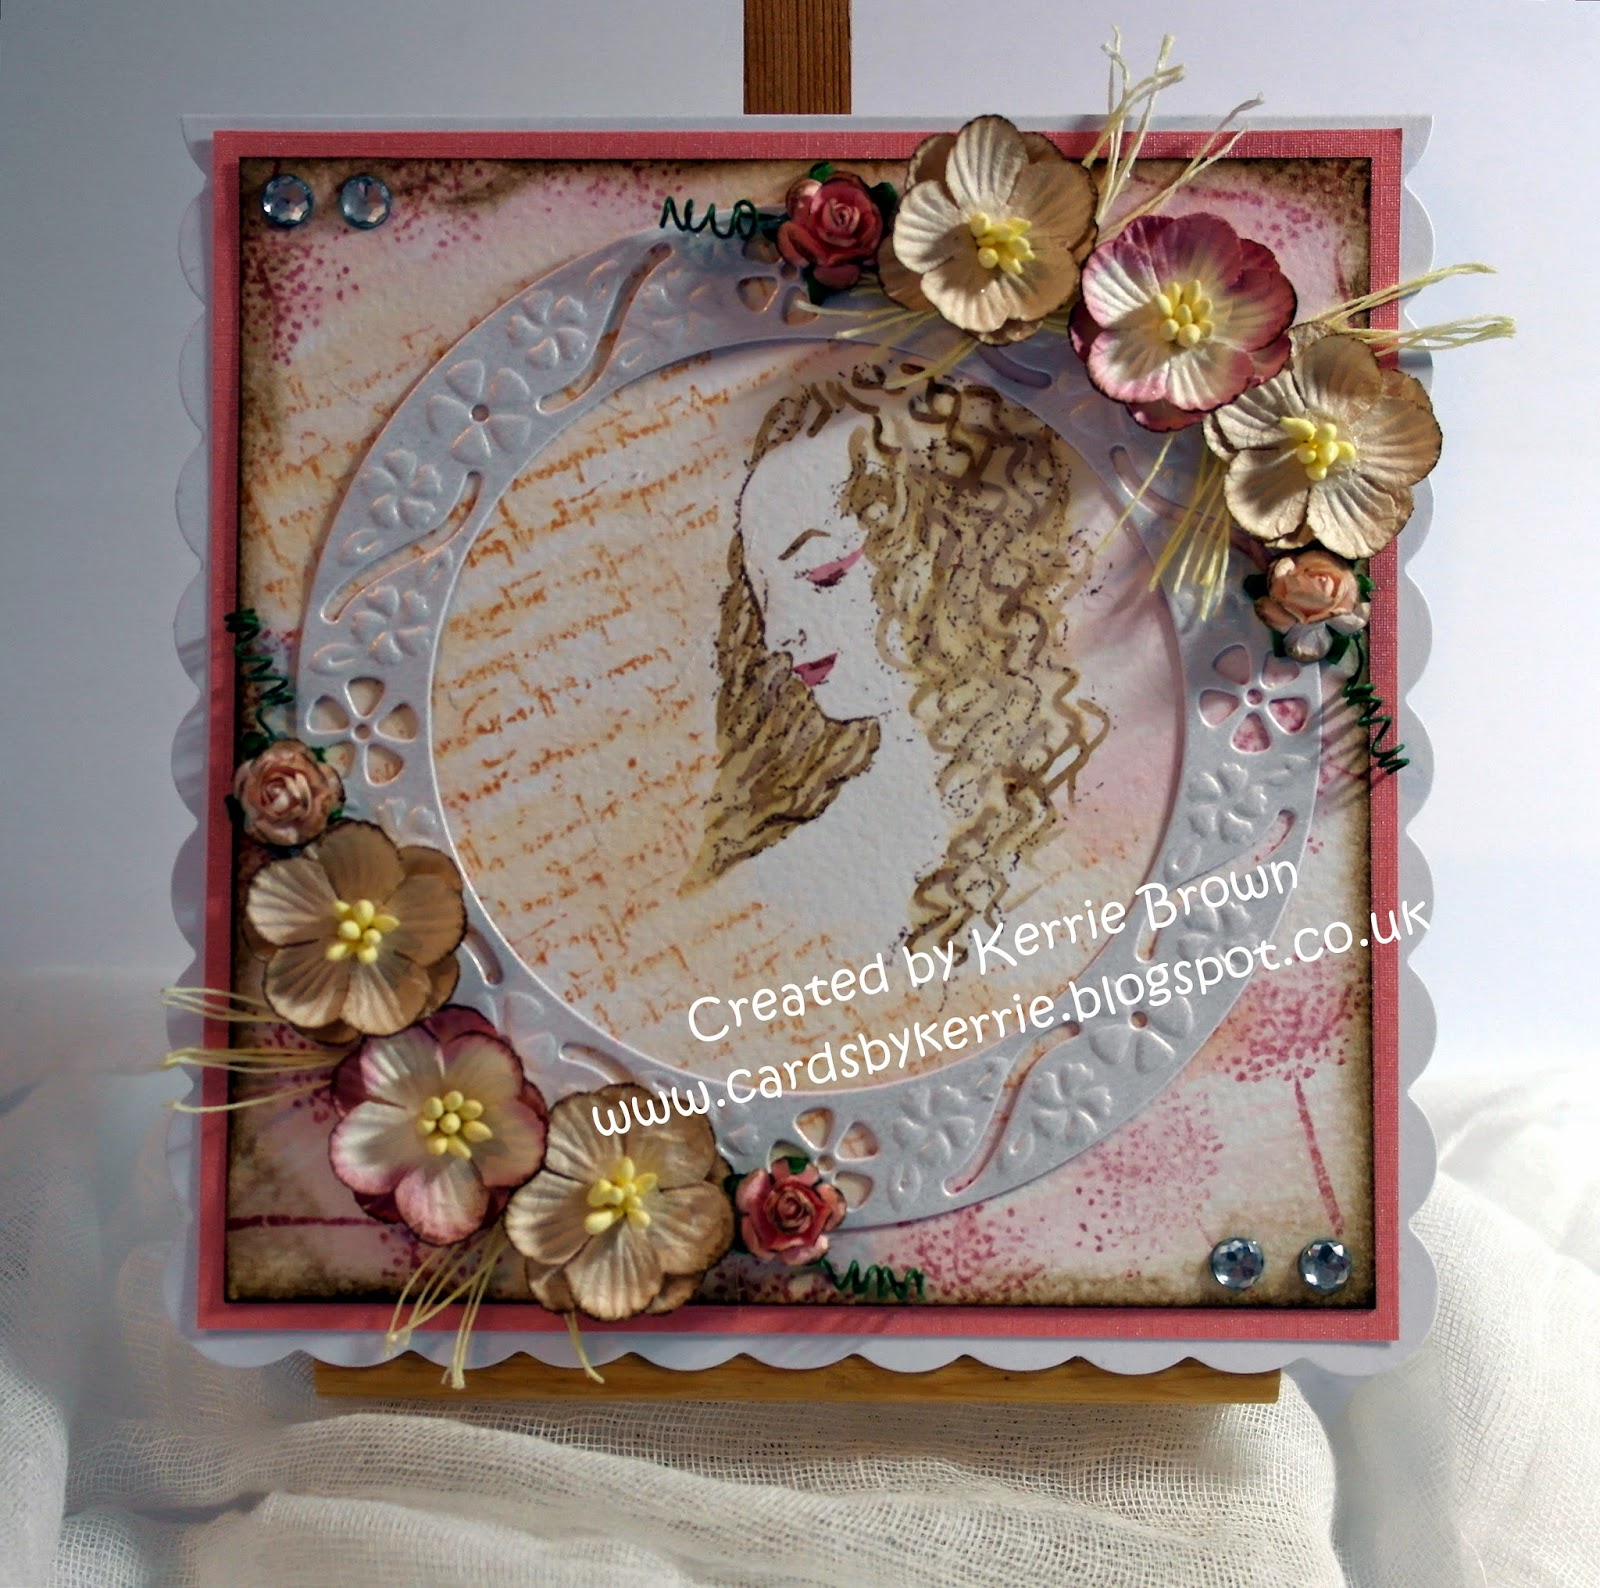
Science of Beauty - Inspired by Da Vinci - Bee Crafty Stamps DT

Hiya and welcome to my Tuesday post for Bee Crafty Stamps

I have been getting messy with some of my Inspired by Da Vinci stamps I brought with my pocket money a few weeks ago - I have a Need! list of  new stamps for Payday im a bit addicted 


For this card I have used....


Distress Ink Pads - Victorian Velvet, Tea Dye & Walnut Stain

White Pearlescent Cardstock

Watercolour Card

Pearlescent Textured Paper

6x6 Scallop Card Blank

Circular Frame Die

Waterbrush & Blending Tool

Paper Flowers - Cherry Blossom & Roses

Gems


I stamped Science of Beauty off-centred onto a trimmed piece of watercolour card using Memento Ink 'Rich Cocoa' then stamped again onto eclipse masking tape and cut around to form a mask which I fixed over the stamped image on the card. I then inked up the Da Vinci Script using Tye Dye distress ink and stamped twice over the edge of the mask to create a script background. I inked up the Cow Parsley and stamped around the edges of the card filling in all the gaps and stamping in various directions. I then removed the mask to reveal no script has been stamped accross her face. I used my waterbrush to wash over the background blending the 2 colours slightly. I tapped the Walnut Stain & Victorian Velvet ink pads onto my glass mat then using my waterbrush to pick up the colour I painted her hair and features of her face. I let this dry out while I prepared my paper flowers, first I trimmed off the stems then inked the edges using Walnut Stain ink and my blending tool. 

I trimmed a piece of pink pearlescent textured paper to a leave a few mm border around the watercoloured picture and fixed this to the cardblank. I inked the edges of the watercolour picture using Walnut Stain ink and my blending tool and attached this to the card front. I die cut the Circlular Frame using white pearlescent cardstock - I attached this over Science of Beauty and most of the script to frame them using a glue gun. I then arranged and fixed the flowers using the glue gun. I used the stems to create foliage in between the flowers. I finished the Card with some gems in the corners.


I hope you like my project and will visit again soon to see gorgeous makes by the Design Team Girls

Krafty Hugs xx


TCBOTB Background

Related Posts Plugin for WordPress, Blogger...