Followers

Showing posts with label Mixed Media MDF Substrates. Show all posts

Friday, 22 September 2017

Don't be Afraid to Sparkle - Paperbabe Stamps Challenge - Picture Inspiration

Hiya and Welcome to my Blog

I'm so sorry that I have not been around much of late... I have been quite down but I am slowly starting to pick myself back up 

Today is a Challenge Day over at the Paperbabe Stamps Blog so the Team has been busy making pretties to share with you

The theme of the Challenge is a 'Picture Inspiration'


Paperbabe Stamps Challenges are open to everyone...
As usual you are welcome to combine with other challenges.
Please be sure to link your project below for a chance to win Paperbabe Stamps Gift worth up to £20*
 
You can create any project you like as long as it is inspired by the picture below or the colour scheme etc.

Here's the Picture inspiration...for the challenge 


For my Design Team Project I have picked out the colours from the colour scheme to use in my project. I made a cute little easel card that could be used for any occasion

 
 I picked out a patterned backing paper, complementary coloured cardstock in colours similar to the colour scheme and some silver mirror board for layering.

I created the easel card using a 6x6 cardblank and half of another 6x6 cardblank this time with a scalloped edge. 

The Backing paper I chose to use is A5 and I managed to make this card using only one sheet. First I trimmed a piece to a few mm smaller than the 6x6 cardblank to use on the base of the easel card i then layered using a green cardstock and silver mirror board. For the card front I trimmed a piece of lavendar cardstock to a few mm smaller than the scalloped edge, I then layered with silver mirror board. I trimmed the offcut from the A5 backing paper and attached to the left side of the card front.

I made the easel stopper using offcuts from the cardstock and papers, layer on top of each other and fixed in place using foam tape to created the raised stopper.


for the topper I cut a piece of linen cardstock which I then make an inky painty background using sage and pink inkpads, a waterbrush and an ink blender tool. I then stamped the Large Butterfly solid stamp (from the 'Butterfly Peridae' set) at a jaunty angle using a mauve ink. I added a sparkle trail using wet glue and dazzle dust glitter. I inked the edges using versamark ink which I then dipped into Snowflake Tinsel' embossing powder which i then heated using a heat gun.

I stamped and embossed the Large Butterfly details stamp (also from 'Butterfly Peridae') using versamark and the same embossing powder as before onto vellum. I fussy cut the butterfly, shaped the wings with a bone folder tool to created depth. i attached over the butterfly i had stamped previously using wet glue. The vellum butterfly gives the ellusion of movement to the wings. for the body i used a few little wooden substrate pieces from the 'Mixed Media blank accessories' pack. 


To finish I stamped the 'Don't be Afraid to Sparkle' sentiment stamp and the little antenae using grey ink.

I fixed the finished topper to the card front using foam tape for dimension.

So, it's time to create anything, use the picture or colours as inspiration as always be sure you use at least one paperbabe stamps product in your creations, HAVE FUN, and don't forget to link your project over on the Paperbabe Blog

---------- ~ • ~ ---------- ~ • ~ ---------- ~ • ~ ---------- ~ • ~ ---------- ~ • ~ ----------

*So, if you use Paperbabe Stamps in your projects you have the chance to win £20 of Paperbabe Stamps, otherwise the prize will be £10.

Please enter your fabulous projects on the Paperbabe Stamps Blog
Challenge ends: 
 
Thank you for joining in!


Thursday, 20 October 2016

New MDF Substrates - 'Bottle Of' - from PaperBabe

Hiya and Welcome to my Design Team Post for PaperBabe Stamps

We are Introducing the New Products in the PaperBabe Etsy Shop and Today I am sharing a Project I have made using the New MDF Substrates that match the 'Bottle Of' Stamp Set


I created a Mixed Media Portrait that will be part of our Halloween decor this year as I love how it turned out. I took a long time to put together but I loved every minute

I used an A4 Canvas Board which I covered using jointing tape (from Hubby's Shed) I then used polyfiller to smooth over the board this gave the whole board more strength. Next I smoothed more polyfiller through a brick stencil over 3/4 of the board and through a burlap stencil over the last 1/4. Once dry I painted these areas the bricks using magnolia and mushroom chalky paints and the burlap using magnolia and vintage blush chalky inks. I wanted to create brick wall and wallpaper effects.

I asked Hubby to cut a piece of routed wood for me to form a shelf (I love that my Hubby is so talented with wood) I painted the wood piece using white gesso, once dry I painted over the gesso with light brown watercolour which gave a nice wood grain effect. I fixed the wooden shelf to the board using my hot glue gun.


The bottles I painted all the pieces first using white gesso, then added colours using watercolour paints. I stamped the labels using Archival Ink in Black. I painted sold gold paint over the mermaid tears bottle which I had also stamped and painted bubbles on using the dot outline stamp from the Birthday Wishes stamp set. I dusted faint glitter onto the dragon dust bottle and used glitter glue over the fairy dust bottle. I glued all the pieces of the bottles together then attached to my project just like they are sitting on the shelf I made.


Next I created a Mini Portait of The Witch I imagined would be the owner of the Bottles. I stamped the 'Mayleedee Witchily' stamp onto white cardstock and coloured her using my coloured pencils, the background is watercolour pencils and water. I created a frame by first gluing the mini portrait to a piece of gold cardstock, then by die-cutting a piece of white craft foam using an ornate frame die and a square die. I then painted the foam using gold acrylic paint which once dry I glued over the mini portrait. I then attached the mini portrait in frame to the brick wall on my project. 

I painted over the whole project using 2 layers of Mod-Podge to seal

I have really enjoyed making this project it was a lot of fun. I have really started to enjoy making Mixed Media projects and I know I will be making more of them in future

Don't Forget to visit the Paperbabe Stamps Blog and my Teamies Blogs below to see more Gorgeous Projects 


Thank You so much for visiting my Blog today... please leave me a comment so I know you have stopped by

Krafty Hugs xx


Tuesday, 23 August 2016

Hiya this week over at Paperbabe Stamps we are having a 'Picture Inspiration' Challenge.
Your make should be inspired by the picture below. You can use the colours, the shapes or the theme but as long as your make is inspired by the picture then pretty much anything goes


The prize for the challenge is amazing but even more so if you use a Paperbabe Product in your entry project. So please do go and check out the Paperbabe Blog to see all the details - we would love to see all your gorgeous makes


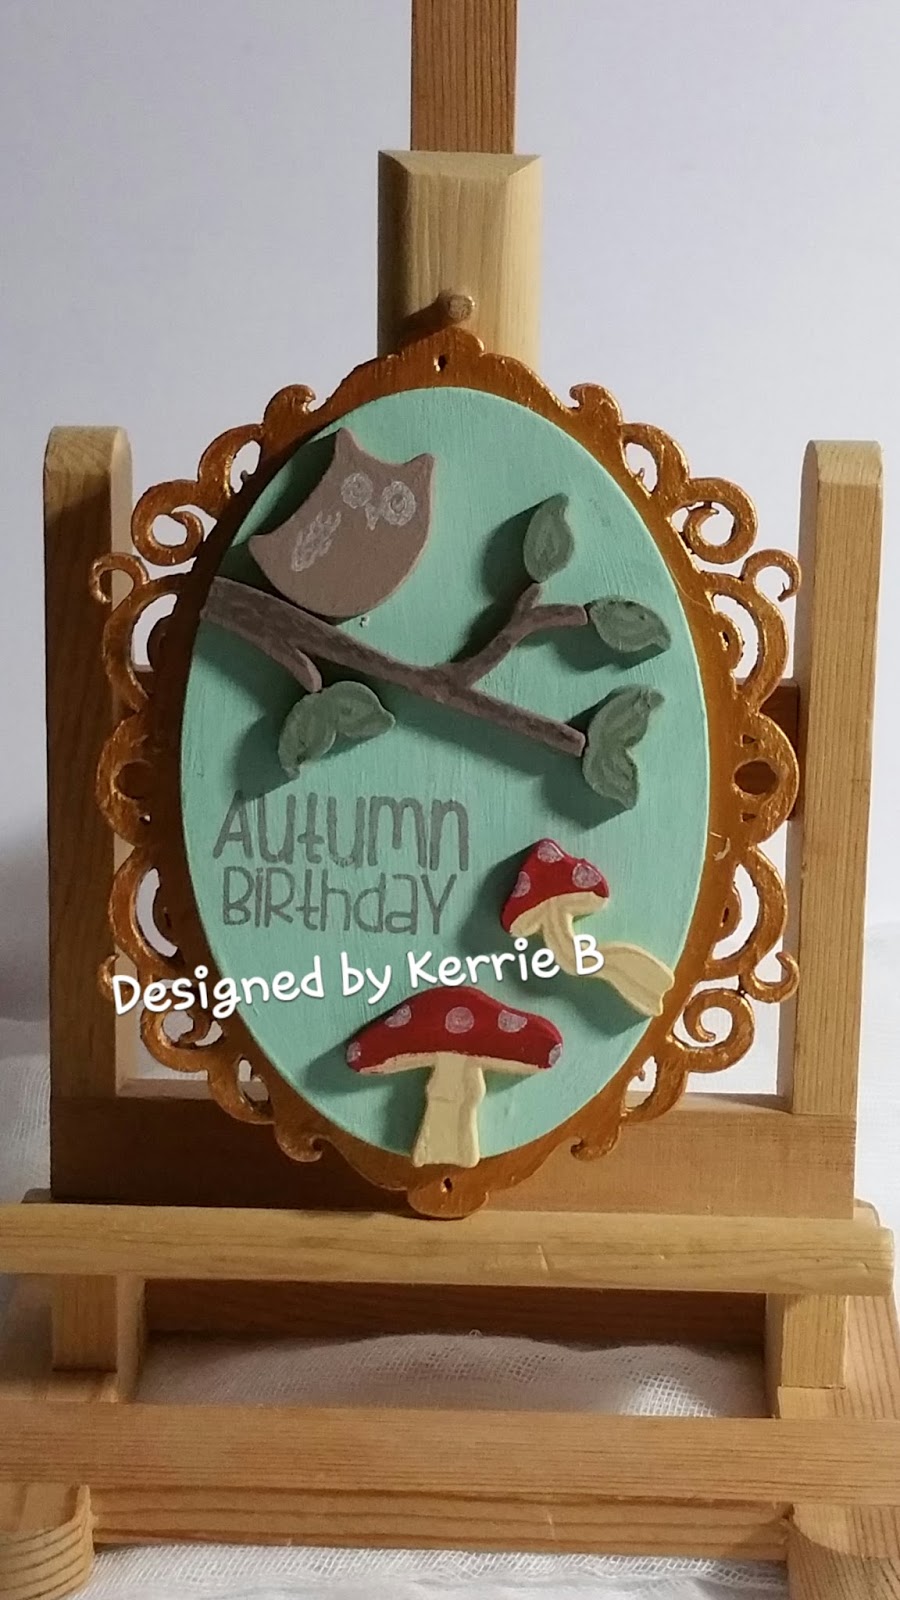
For my make I have used some of the Mixed Media MDF Substrates - the Whimsical Woodland set and the Ornate Frame Oval kit painted first with gesso and then with chalky paints and gold acryllic paint to create her mini hanging plaque.

Which will now be pride of place on my wall in 'Kerrie's Kraft Korner'.


I also stamped the details using a mixture of coloured inks aswell as the matching stamps from the 'Whimsical Woodland Owl' and the 'Whimisical Woodland Butterfly' sets.

Thank you so much for visiting my Blog today please leave a comment so I know you have been and visit again soon for more makes from me 

Krafty Hugs

TCBOTB Background

Related Posts Plugin for WordPress, Blogger...